 A sharp mower blade cuts grass cleanly. A dull blade tears it. Tearing leaves frayed grass tips that turn brown, attract disease, dry the lawn out faster, and make your cut quality look bad even when everything else is dialed in. Most homeowner blades should be sharpened every 20-25 hours of mowing, which usually works out to twice a season for an average lawn.
Here's how to do it right at home with basic tools, plus when you should just bring it in and let someone with a grinder handle it.
Tools you'll need
The minimum kit:- Bench grinder, angle grinder, or sharp file - any of the three works. Angle grinder is fastest, file is most forgiving for beginners.
- Vise or clamp - holding the blade steady is critical for an even edge
- Safety glasses + gloves - non-negotiable, blades throw chips when ground
- Blade balancer ($8-15) or a nail driven into a wall - to check balance after sharpening
- Marker or paint pen - to mark which side was up before removal (some blades aren't symmetric)
Step 1 - Remove the blade safely
Disconnect the spark plug wire BEFORE you do anything else. A bumped flywheel can spin the blade and take a finger.Tip the mower so the carburetor side is UP (otherwise oil floods the air filter). On a walk-behind, that usually means tipping toward the operator side. On a riding mower, jack up one side or run it up onto blocks.
The blade bolt is usually 9/16, 5/8, or 15mm depending on the engine. It's almost always right-hand thread (turn counterclockwise to loosen). To keep the blade from spinning while you crack the bolt: wedge a block of 2x4 between the blade tip and the deck wall.
Once it's off, mark which side was facing the ground. Most blades have "TOP" or "THIS SIDE UP" embossed in the metal, but not all do.
Step 2 - Clean the blade
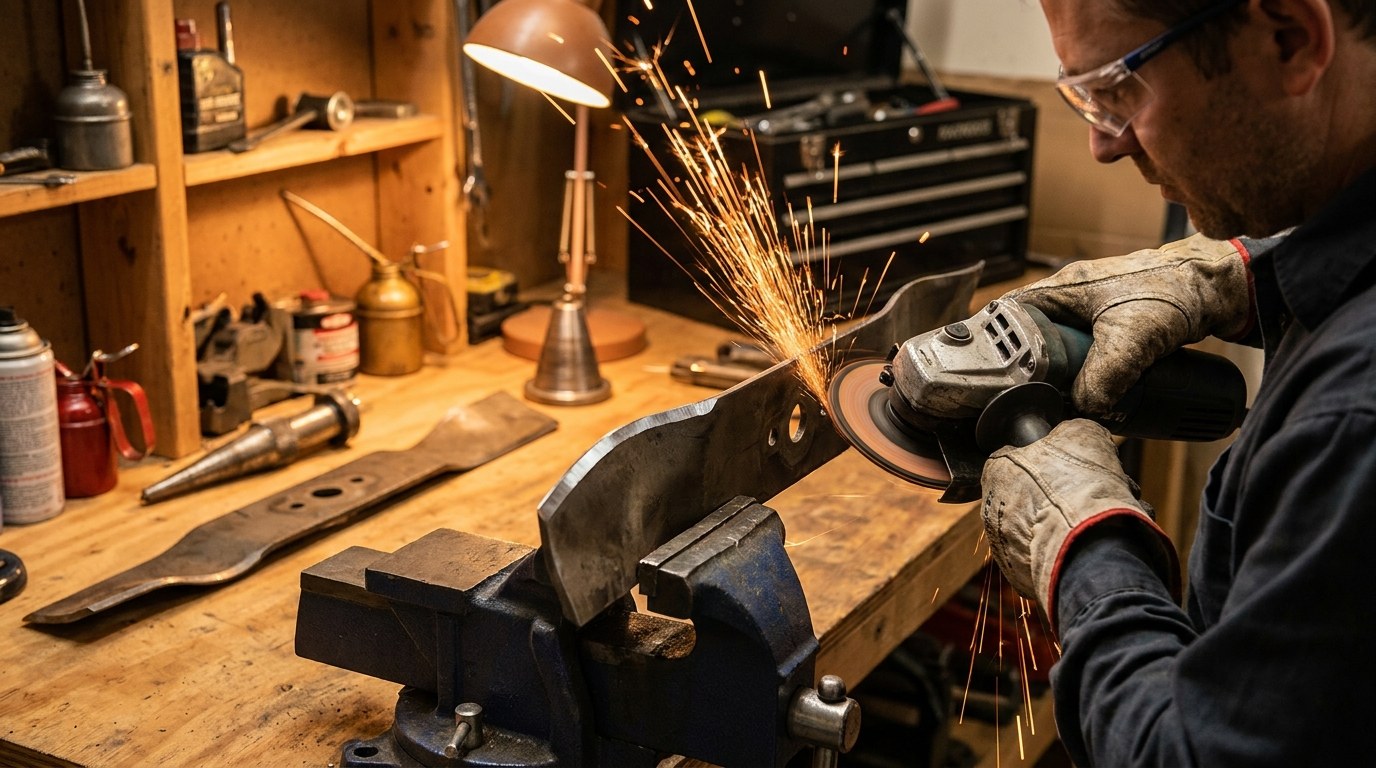
Hose off the grass clippings and dirt, then wire-brush both sides. You need to see the existing edge clearly to follow the original bevel angle. A blade caked with grass-mud will hide the bevel and you'll grind it at the wrong angle.Step 3 - Set up the bevel angle
Mower blades have a 30-degree primary bevel from the factory. That's pretty shallow compared to a kitchen knife (which is 15-20 degrees) - mower blades are designed to chop grass, not slice it, and a too-sharp edge actually rolls and dulls faster.Clamp the blade in a vise so the cutting edge points up at a comfortable working height. Mark the existing bevel line with a paint pen so you have a visual reference of where to grind.
Step 4 - Sharpen
Whatever tool you're using:- Follow the existing bevel - don't try to re-grind a new angle. Match what was already there.
- Grind both cutting edges equally - blades have two cutting edges (one on each end). Remove the same amount from each to keep the blade balanced.
- Light pressure, multiple passes - heavier pressure causes the blade steel to overheat and lose temper (the heat-treatment hardness). If the metal turns blue, you've cooked it.
- Aim for "butter-knife sharp" not "razor sharp" - you want a clean edge but not a thin one. Thin edges chip the first time they hit a stick.
- Quench in water periodically if grinding - keeps the blade cool and preserves the temper.
You're done when the cutting edge is uniformly thin and shiny across both ends, with no nicks, gouges, or curled edges.
Step 5 - Check balance
This is the step homeowners skip the most often, and it's the one that matters the most for spindle bearing life.Hang the blade on a balancer (or set it horizontally on a nail driven into a wall) at its center hole. A balanced blade stays level. An unbalanced blade tips toward the heavy end.
If one end dips, grind a tiny bit MORE off the trailing edge or the flat back of the heavy end (never the cutting edge - that side is set). Re-check balance. Repeat until it sits level.
An unbalanced blade running at 3,000 RPM vibrates the spindle bearings to death. That $50-100 spindle assembly will fail in a season. Five minutes of balance-check saves you the bearing replacement.
Step 6 - Reinstall
Put the blade back with the marked side facing down (the cutting edge "leads" in the direction of rotation - clockwise from above on most mowers).Torque the blade bolt to spec - typically 50-60 ft-lbs on homeowner mowers, 70-90 ft-lbs on commercial decks. Too loose and the blade can come off mid-mow. Too tight and you'll snap the bolt next time you try to remove it.
Reconnect the spark plug wire.
When to just replace the blade instead
Sharpening doesn't fix everything. Replace the blade if:- It's been sharpened down to half its original height (you'll see it - the original profile shows on a new blade)
- The cutting edge has nicks deeper than 1/8 inch that won't grind out without removing a lot of metal
- The blade is visibly bent, warped, or has cracks anywhere
- The center hole has worn out-of-round (the blade walks on the spindle - dangerous)
- The trailing-edge airfoil is bent or broken (it won't lift grass properly even if the cutting edge is sharp)
New blades run $15-35 OEM, $10-20 aftermarket. Cheaper than the bearing replacement an unbalanced or worn-out blade causes.
When to bring it to the shop
DIY sharpening is fine if you've got the tools and patience. Bring it to us if:- You don't have a vise + grinder/file setup
- You've never done it and want to watch how it's done
- You need 6+ blades sharpened (we'll batch them and the per-blade time goes way down)
- The blade is gouged badly and needs more aggressive grinding than a file can do
Sharpening service runs $8-15 per blade depending on condition. We balance every blade before it leaves the shop. If you're already in for other service, the blade sharpen is usually free.
Related reading
Need a blade sharpened or replaced?
We keep OEM and aftermarket blades in stock for most Spartan, Echo, and common box-store machines. Sharpening service is $8-15 per blade, balanced, ready same-day during off-season and 1-2 days in spring. Drop off in Laddonia or call about pickup.